Extended Side Angle Fundamentals
In this article we highlight some of the foundational asanas. We also describe common misalignments that are useful to be aware of if you’re a yoga teacher or student.
To prevent injury it is important for students - and of course teachers - to have a strong foundation before moving on to more advanced postures. This way you will build strength and develop body awareness.
What was I doing wrong
Extended side angle was always one of my favorite poses but only recently I discovered I was doing it wrong. I can hyperextend my arms a lot and I used to pull my arm all the way out of my shoulder girdle. That felt as a good, deep stretch. Then it became an injury. I had hyperextended my arm so often that I developed chronic pain in my shoulder.
Together with my physiotherapist I eventually learned a new, more sustainable way of extending my arm. So if you can hyperextend like me, be careful in this pose. You can do utthita parsvakonasana without hyperextending your arm and still get a good stretch!
Don't fix on the final posture
Don’t fix on the ‘final’ posture. Rather focus on a version of these postures where you can hold a steady deep breath. Yoga is about moving from body awareness, not from the mind. If you can’t keep your breathing calm, you’re probably going too deep into the posture.
What are the benefits
- Strengthens arms, legs and ankles
- Stretches hips, groins, ankle, chest, lungs and shoulders
- Stimulates internal organs
- Energizes the body
Watch out for the following
- Knee or hip injuries
- Shoulder injuries: place upper hand on hip
- Neck problems: gaze forward instead of over the fingers of your front hand
Alignment cues
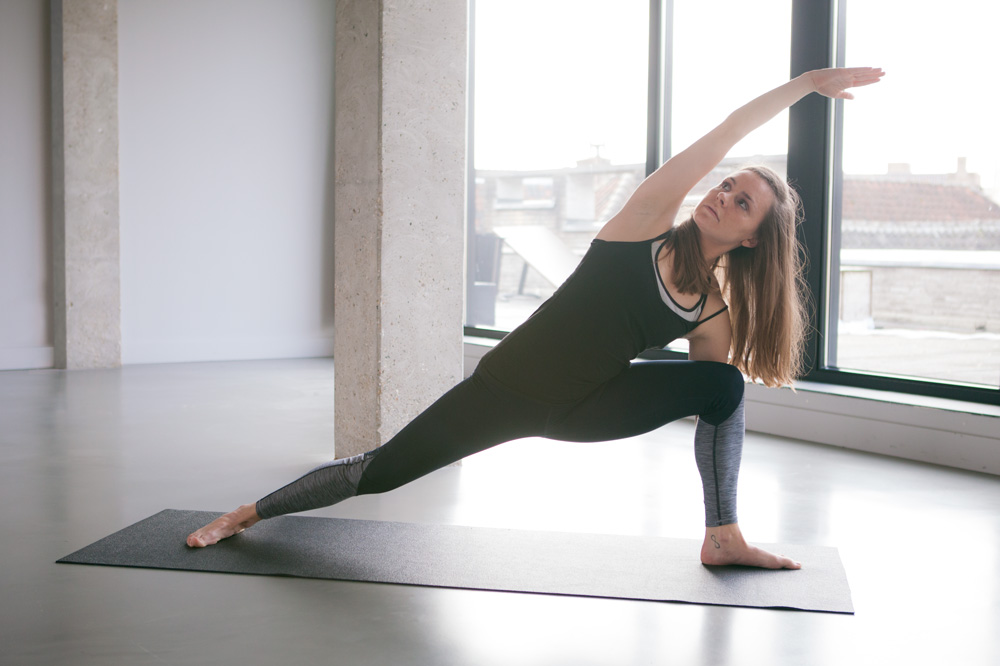
- From Tadasana step away with your right foot towards the back of the mat in a wide stance
- Place the sides of your right foot parallel with the short side of your yogamat, place heels in a straight line or if you prefer, front heel in line with the arch of your right foot
- Bend your left knee
- Raise your right arm up and over your right ear but don’t hyperextend
- Left hand is placed on floor or block. If this is too much, place left elbow on left thigh, just above the knee
- Shoulder blades fixated on your back, relax shoulders away from ears
- Belly tucked in, chest opened
- Gaze toward your right upper arm if this feels comfortable for your neck
- Push through right foot, keeping the sides of your foot anchored to the floor
- Keep your side long, don’t collapse here
- Right hip is opened and moving away from the front of the mat
- Hold for 5-10 breaths
- Repeat on the other side
These are the common misalignments
- Back foot collapsed and not anchored to the floor. Keep actively pushing the sides of your back foot towards the floor. The arch of the foot should raise
- Hyperextending the arm that is above your head. Keep your shoulder blade fixated on your back as much as you can
- ‘Broken’ angle. A lot of students find it hard to feel when they are forming a straight line from the sides of their foot to the fingers of their raised arm. Walk around and adjust your students or if you are practicing by yourself try it in front of a mirror.
- Sides collapsed. Many students have trouble to keep their sides long. Envision you are expanding and elongating your sides with every in breath you take.